What this guide helps you do
Upload a product's photographs, choose the first/main photo, reorder or remove images, and give a shop variant its own gallery when supported.
Before you start
Use Manage inventory access in the correct store. Prepare supported image files or publicly reachable HTTPS image URLs. Check your storage allowance and each picker's limits.
Where to find it
Partner → Menu/Products → open a product → its image/gallery control. For a product-catalog variant, open the variant image control in the variant matrix/editor. On a phone use the product card and editor page.
Step by step
-
Open the product, then its photo/gallery picker. Inspect any existing images before replacing them.
-
Upload a supported local file or use the image URL option when offered. The URL must point to a public supported image, not a private webpage.
-
Original is selected first and keeps the full photo in its uploaded ratio. Choose Use original, or select a crop ratio, position the subject and choose Use crop. Source shows the uploaded dimensions; Crop shows the dimensions that will be saved. Review each queued file before returning to the product editor.
-
Add additional photos while the picker permits more. Use the offered reorder controls to place the preferred/main photo first.
-
Remove an unwanted photo from the gallery. Do not assume removing it also deletes another product that references the same file.
-
For a shop variant, select the relevant SKU/variant and edit its own images. A variant can fall back to the product gallery when it has no overriding gallery.
-
Save the product/variant changes using the editor's save action. Keep the sheet open until success.
-
Open the public product/item details and check the first photo, gallery order, and selected variant. Use the previous/next controls, thumbnails or a swipe to move between photos. Check a phone view as well as desktop.
Understand the choices
-
Gallery order matters: the first image is the lead image. Cards, lists and search results show only the lead image; customers browse the other photos after opening the item. The storefront theme owns the gallery's visual presentation.
-
An external URL is imported and checked. A URL that needs a login, redirects to a private network, or is not an image is rejected.
-
Product photos, variant photos, hero covers, and the page Gallery are separate controls.
-
Image limits are enforced at upload and save. The upload picker and quota message show the applicable limit; avoid hard-coding a limit from an older tutorial.
Check the result
After saving, the public item shows the chosen lead image and ordered gallery. Choosing a variant displays that variant's images or the intended fallback.
If something goes wrong
-
URL import fails: use a direct publicly accessible HTTPS image or download an authorized copy and upload it locally.
-
Crop canceled: the previous image stays; reopen the picker to try again.
-
Gallery changed in the picker but not live: complete the product's Save action.
-
A SKU photo seems wrong: confirm the selected variant and its fallback to product images.
Screenshots
These screenshots use demonstration data. Your names, amounts and available controls may differ. Current values on your own screen take priority.
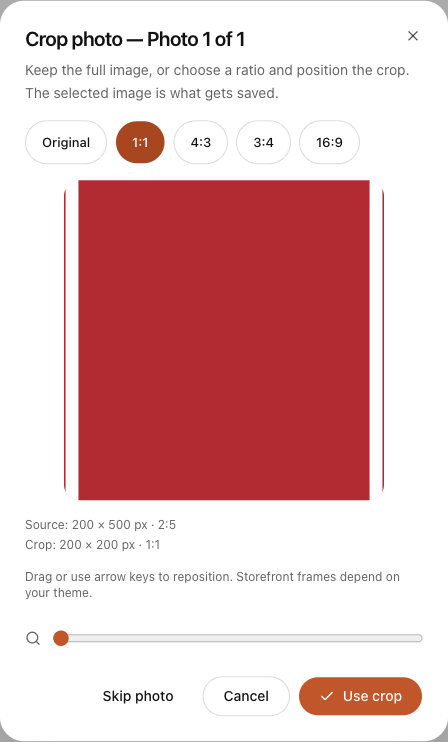
Review the selected 1:1 crop around the subject before choosing Use crop.
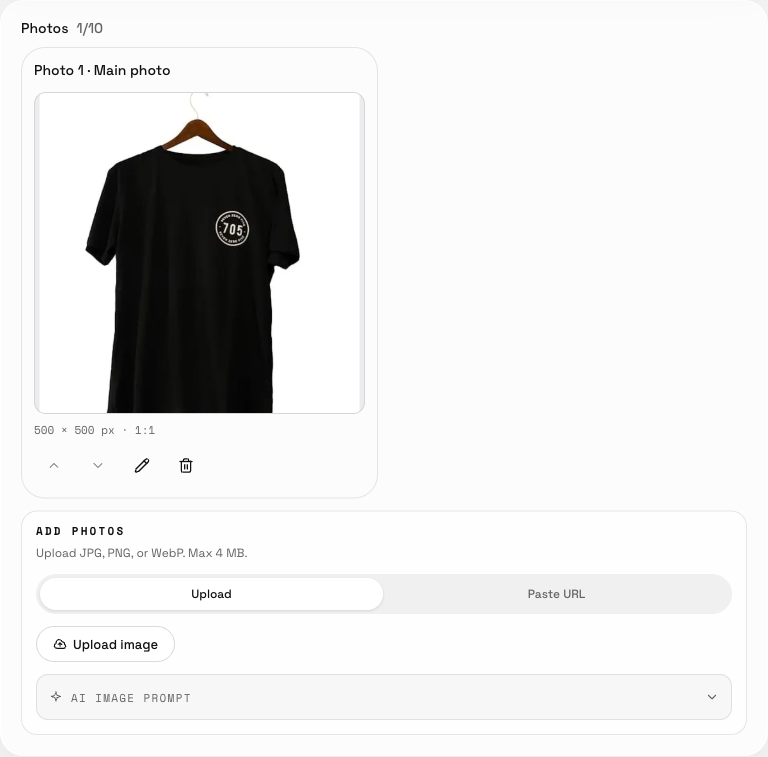
The saved gallery shows one uploaded image and its order; reopen the product to verify it.