What this guide helps you do
Follow the store-creation wizard from category choice to a working storefront, understanding what must be completed now and what can be added in Partner later.
Before you start
Use your owner account, or complete signup in the wizard. Your package must have room for another store. Prepare a store name, your products and prices, an owner phone, and the fulfillment methods you offer. If your menu or price list already exists as photos, PDFs or spreadsheets, you can let an AI chat fill a store file instead — see Set up a store from a file with AI.
Where to find it
Workspace → Experiences → Create Experience. On a phone open the Experiences tab and use the create action. A marketing signup intended to create a store can also bring you into this wizard.
View your live page opens the real storefront address and Go to Krobr Partner opens the matching store in Partner, each in a new tab. Go to my experiences keeps you in the workspace.
Step by step
-
Choose Restaurant or Shop (Product Catalog). Travel and Service Catalog are marked coming soon; do not select a category that is not launchable.
-
Complete Signup and the email-code step if asked. Existing signed-in owners skip this step.
-
Choose Set up manually to type everything step by step, or Upload a store file to fill every step from a file an AI chat prepared (Set up a store from a file with AI). Either way you check each step before publishing.
-
Enter the store Store name. In Design, choose a theme, use View to inspect its demonstration, and explicitly select a template if you want its starting menu/products — its items arrive complete, with descriptions, sizes and add-ons or SKUs, badges, old prices and photos.
-
In Branding, confirm the store currency and timezone, then add your logo/colors if ready. A logo file or Paste URL opens a fixed 1:1 crop: position the logo and choose Use crop. Location permission is optional; you can choose the timezone manually.
-
Optional steps for every store: Hours (one or more time ranges per day; for a full weekday turn on Open 24 hours — the time inputs hide, and turning it off restores 09:00–17:00), Visit details, and Storefront text and photos (tagline, About text, contact email, social links, cover photos and gallery; a blank field keeps what your design shows). A restaurant can also add up to three Menu times, such as Breakfast or Lunch, on the Hours step.
-
On Menu (or Products for a shop) add categories and items with a name and price. Choose More details on an item for photos, description, sizes and add-ons (or option axes and SKUs with stock), badge, old price and tags. An item marked Needs a fix must be corrected or removed before you can publish.
-
On Charges add any fee as a Percent or a Fixed amount. On Ordering (Fulfillment for a shop) choose methods and complete their fields, then set the Delivery fee and Free delivery over amounts (a shop can charge by weight instead). A restaurant may explicitly choose Menu only; a shop must use its supported checkout methods.
-
At Publish, review the owner phone and the chosen settings, and fix or remove any item still listed as needing a fix. If Web address is offered, set it only when you are certain: it is permanent. Leaving it blank keeps the generated address. Download my data as CSV saves your whole draft if you want to keep a copy.
-
Choose Publish — go live once and wait. The wizard commits the store at the end, not each time you press Continue.
-
On the success screen choose View your live page to inspect the storefront, Go to Krobr Partner to operate it, or Go to my experiences to return to the account.
-
Open the live page on a phone and confirm the name, prices, category, and checkout methods match your intentions.
Understand the choices
-
The store currency is the currency of your menu and orders; billing currency is separate. A template's delivery fees are copied only when your store uses the template's currency; check the amounts on the Ordering step. Template item prices are copied as written, so review them on Menu or Products.
-
Timezone controls store hours and reservation times. Check it explicitly rather than relying on a traveling device's timezone.
-
Picking a template provides a starting point, not a link that keeps updating your store when that template changes.
-
Changing category after entering category-specific data clears the old category's draft. Review all steps again after switching.
-
Back/Next/Continue preserves the wizard's session draft. Closing the browser session can lose unfinished input — use Download my data as CSV to keep a copy; the store exists only after the final successful commit.
Template designs can include example story text, addresses, contact links and promotional wording. Replace these in the Visual Editor and check the real public page before sharing it with customers.
Check the result
A success screen shows the store's live address. Experiences lists the new store, and Partner opens its matching catalog. If the wizard displays an error, follow the focused field; do not assume a store was created.
If something goes wrong
-
Store cap reached: open Billing & Usage and choose an appropriate package or manage your existing stores. The limit is checked when you open Create Experience: publishing the last store your package allows still shows the success screen, and the next visit shows the limit message instead of the wizard.
-
Publish refuses: complete the indicated phone/email requirement or the missing fulfillment field; the wizard can take you back to the owning step.
-
Template products are missing: explicitly select the template and check Menu/Products before publishing. A template doesn't replace items you already added or imported.
-
Publish — go live stays off: an item is listed as needing a fix. Choose Fix to correct it, or remove it and add it later in Partner.
-
Hours or prices are wrong: correct the timezone/currency and inspect inherited values before committing.
Support partner access
A support partner creates a customer-owned store from Experiences → select the assigned customer → Create Experience (More → Experiences on a phone). Customer detail’s View Experiences selects the same customer. The customer must allow creation. Customer limits and publish prerequisites apply; Save draft is available. Only a phone number the partner enters or changes at Publish is saved to the customer’s account; an untouched number saves nothing, and a number the customer changed in the meantime stays. Partner-created stores use the same customer-controlled access defaults as owner-created stores.
Screenshots
These screenshots use demonstration data. Your names, amounts and available controls may differ. Current values on your own screen take priority.
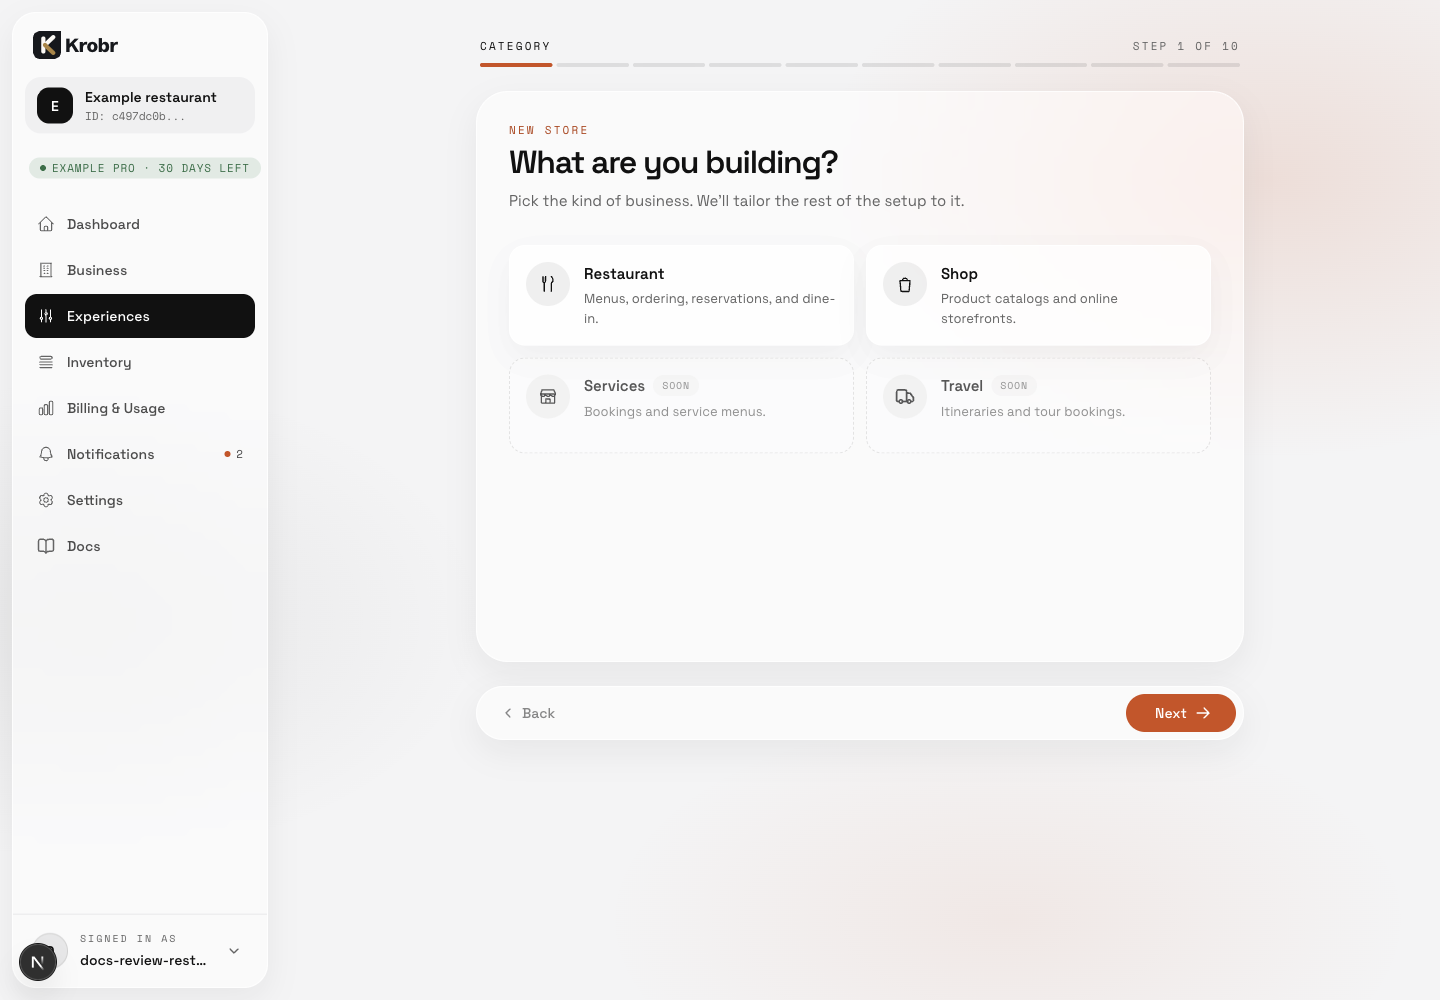
Restaurant and Shop are available; Services and Travel show Soon.
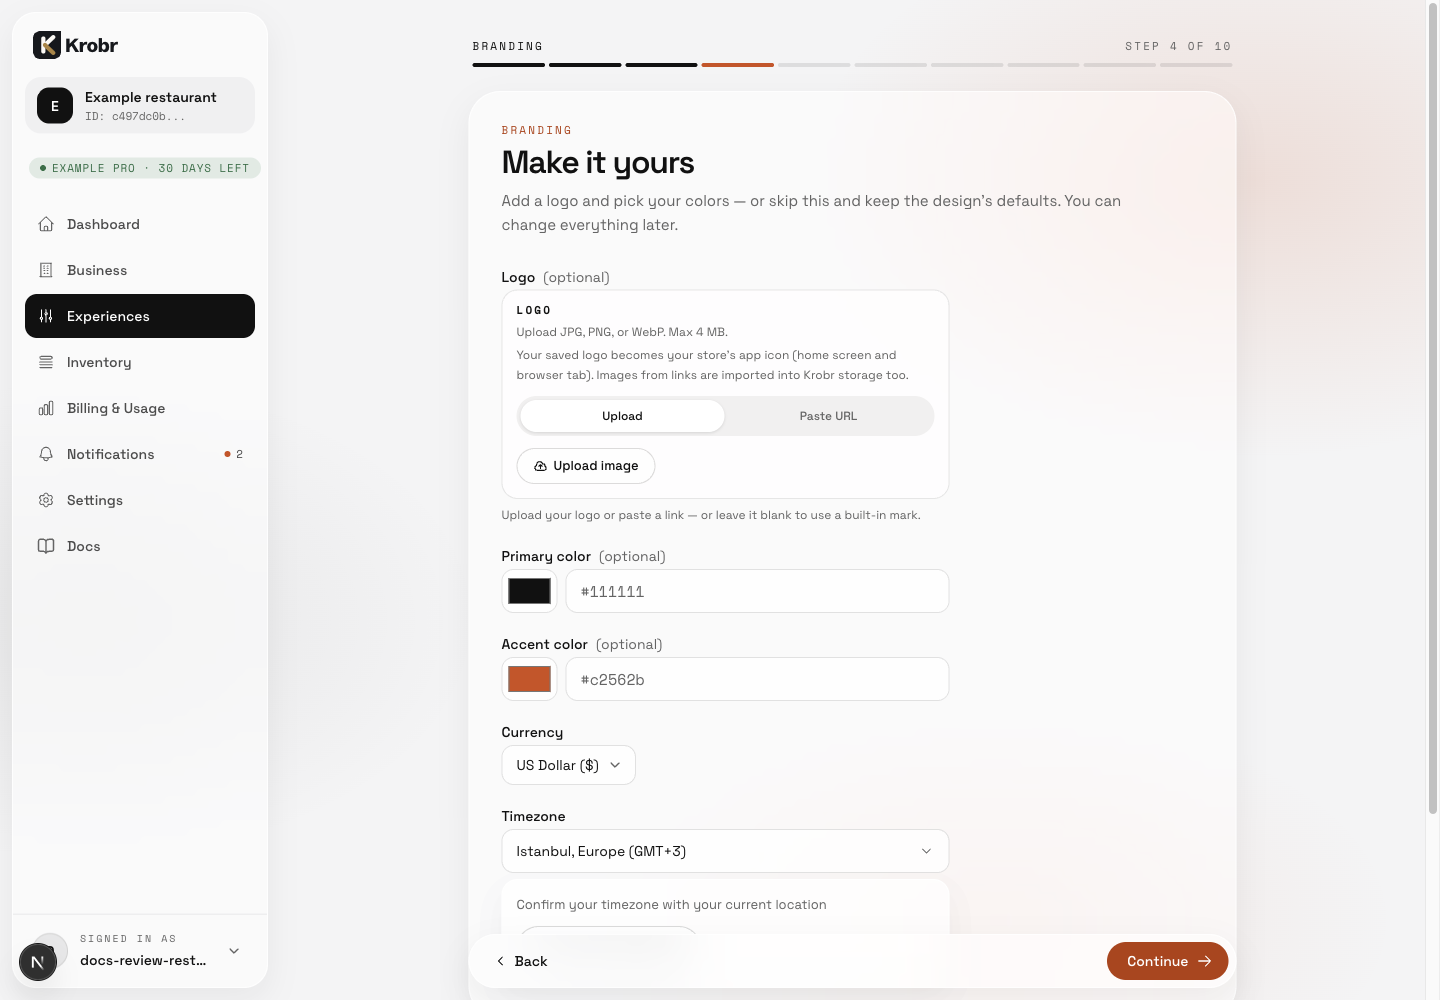
Confirm Currency and Timezone, then review optional branding before continuing.
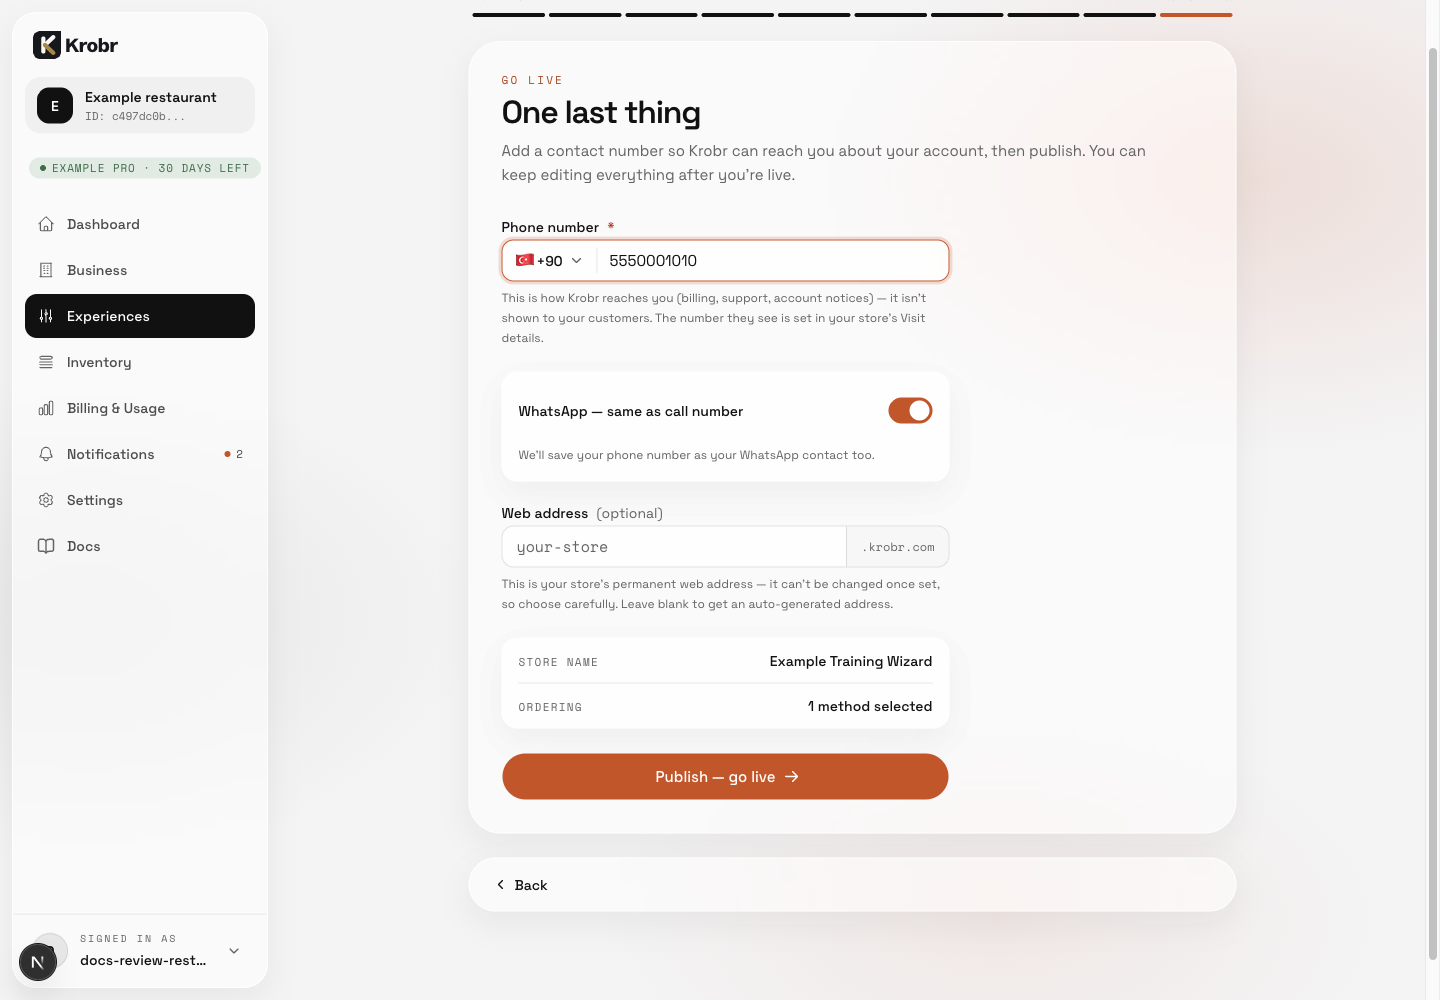
Review the account contact number and permanent web-address choice before Publish — go live.
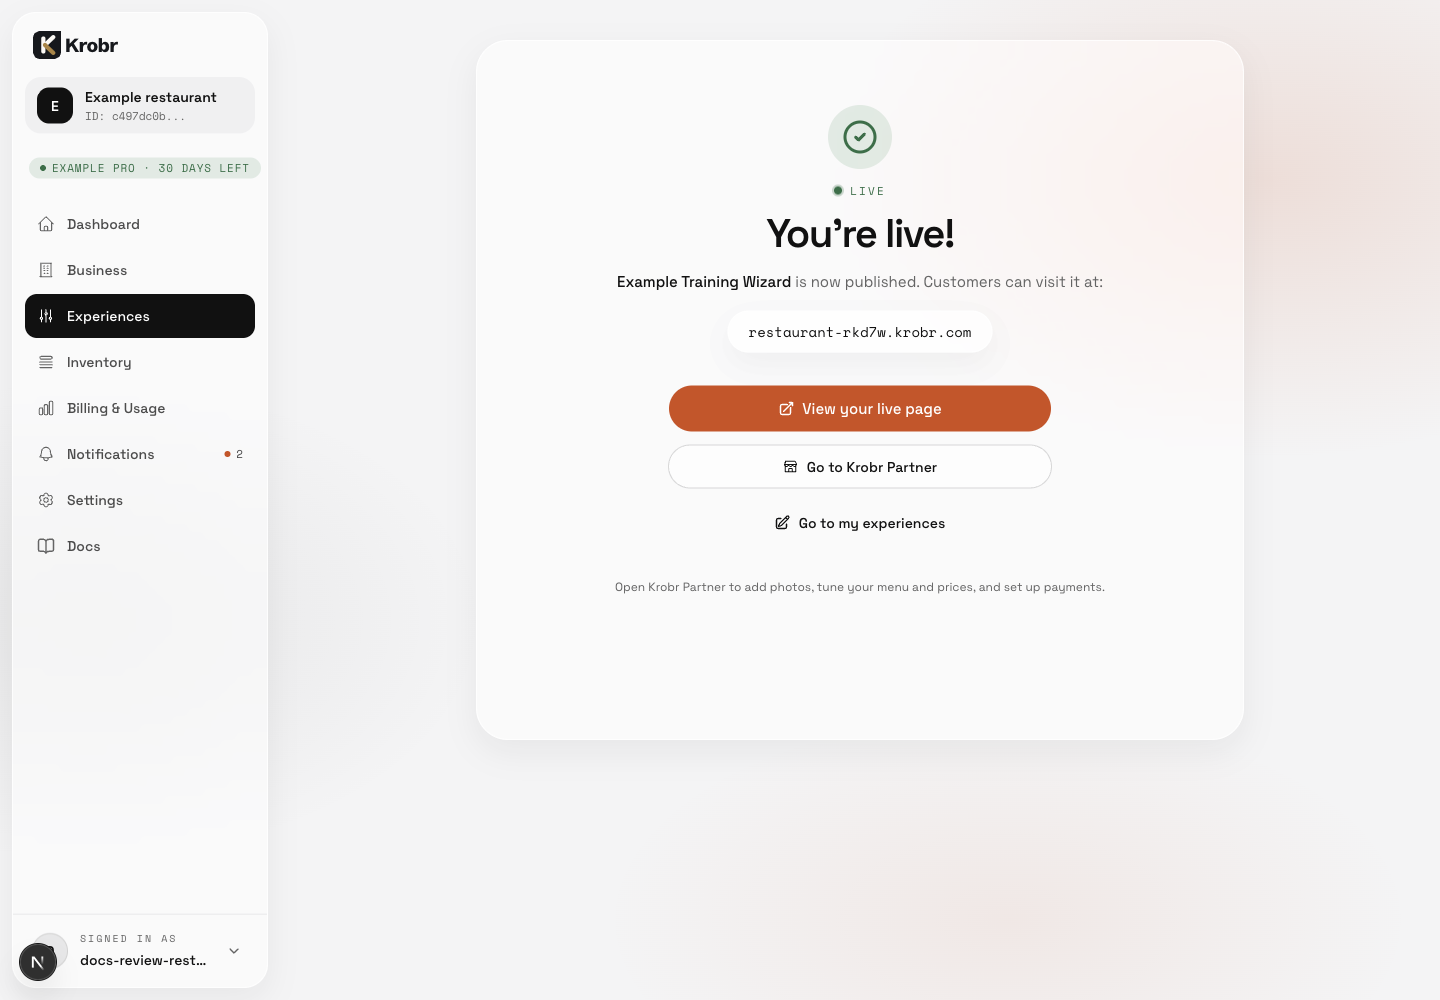
The success screen confirms publication and links to the live store, Partner and Experiences.